Friday 29 June 2012

Car Miniatures

Renault Megane Trophy

Collecting car miniatures namely Hot Wheels, Matchbox, Corgi and Majorette is a long time hobby with up and down interest. There was a time when I did not care about it.

Latest 2011, the interest build up strongly again, collecting about 20+ cars, mainly from Hot Wheels and some Matchbox, some from carboot sale & most from department/toys store.

Even though the level of detail is not as good as a proper model (or even Gundam plastic model), it has good compromises. For example, if a car's main attraction is the grill part, it is there to compliment it, but usually fall short of other detail such as rear light etc. However, with advanced technology nowadays, better details are here. Not all are good though: some have bad paintjob, plastic as the main body and ugly wheels. Best part: the price :)

Clockwise from topleft: Acura NSX, Honda Civic, Chevrolet Camaro, Ford GT 40, custom Hot Wheels, and Renault Megane Trophy 

Lamborghini Gallardo

Honda S2000

Ford Mustang prototype

Porsche 911 GT2
(sorry I forgot some of their full names while posting this)

Thursday 20 October 2011

'Stove Top Coffee/Espresso Maker' @ 'Moka Pot'


Salah satu cara merenih kopi ialah dengan menggunakan 'stove top coffee/espressso maker' @ 'moka pot'. Ia berfungsi dengan mengestrak kopi secara tekanan, sekitar 1.5 bar. Kopinya tidak sepekat/sekuat espresso, kerana espresso menggunakan tekanan lebih tinggi iaitu sekitar 9 bar.

Haba dibekalkan kepada moka pot dengan meletakkannya di atas dapur - dengan api kecil (jika di atas plat panas, pada tetapan haba sederhana - ini lebih baik untuk mengelakkan moka pot menjadi terlalu panas). Air dalam kebuk ('chamber') moka pot dipanaskan, meningkatkan tekanan udara lalu menolak air melalui satu corong ('funnel'). Corong ini dilengkapi dengan bukaan-bukaan kecil (menyerupai penapis) yang membolehkan air panas melaluinya, lalu bertemu dengan kopi kisar disebaliknya - pengekstrakan berlaku di sini. Ekstrak kopi pula akan melalui satu penapis tetap ('permanent filter'), yang kemudiannya akan melalui satu corong, mengalir keluar ke tempat takungan iaitu bahagian paling atas dalam moka pot. Ekstrak kopi akan mengalir ke dalam takungan dengan perlahan (jika terlalu panas, boleh memercik/memancut keluar, yang mana kalau boleh dielakkan). Pada ketika ini sebaik-baiknya bekalan haba dihentikan. Apabila aliran terhenti, tuang air kopi ke dalam cawan sebelum diminum. AWAS! Hati-hati apabila mengendalikan moka pot kerana ia sangat panas pada ketika ini.

Rajah bagaimana moka pot berfungsi boleh didapati di laman web berikut:
http://www.gallacoffee.co.uk/acatalog/How_Stove-top_Works.html

Berdasarkan pemerhatian saya, laju aliran keluar kopi bergantung kepada saiz kisaran biji kopi: jika menggunakan kopi kisar yang halus (seperti Illy Espresso), laju aliran adalah perlahan. Manakala jika menggunakan kopi kisar yang lebih kasar (biasa dijual dalam pek di kedai-kedai), laju aliran adalah cepat. Saya berpendapat aliran perlahan adalah lebih baik.

Kopi yang siap diekstrak boleh diminum terus, namun pada pendapat saya ia terlalu pekat dan kuat untuk diminum begitu sahaja walaupun telah dicampur gula. Saya mencadangkan ekstrak kopi dicairkan dengan air (menjadi americano/long black) - atau dibancuh dengan susu panas (menjadi latte/macchiato/cappucino). 

Ekstrak kopi mula mengalir keluar daripada corong
Buih kopi ('crema') boleh terbentuk namun tidak sebanyak  dan sebaik mesin espresso (yang bertekanan tinggi)
Untuk minuman jenis kopi/espresso bersusu seperti cappucino dan latte, kemahiran memanipulasi bahan kedua terpenting iaitu susu panas adalah sangat penting. Memanipulasikan susu panas ialah proses mengudarakan ('aerate') susu panas - di mana banyak gelembung halus  dan buih akan terbentuk. Tanpa susu panas yang bergelembung halus dan/atau buih, boleh dikatakan minuman jenis espresso kurang menjadi. Pengudaraan ('aeration') susu panas yang saya nyatakan di atas sangat mempengaruhi rasa dan rupa minuman. 
Cappucino buatan sendiri ('home-made') - buih susu disediakan dengan 'french press'
Sebelum ini saya kurang menyedari hal tersebut terutamanya apabila menyangka hanya mesin espresso dengan 'steam wand' yang dapat memanipulasi susu panas. Namun setelah melihat beberapa jenis produk seperti pembuih susu ('milk frother') dan 'Aerolatte' (boleh lihat di Amazon), saya cuba menggunakan 'french press' (yang tidak digunakan sejak adanya moka pot) untuk membuihkan susu panas - ternyata menjadi! Walaupun tidak semudah menggunakan kelengkapan khas, hasilnya amat memuaskan! Cuma, 'french press' agak ketat sedikit ketika proses membuihkan susu, namun berkesan. Hasilnya, susu panas yang bergelembung-halus, kaya dengan buih susu di atasnya - bila dituang di atas kopi, alirannya perlahan dan nampak berkrim ('creamy'), sudah tentu nampak cantik. Untuk buih yang banyak, selepas sebahagian besar susu dituang ke kopi, tinggalkan sedikit susu di dalam 'french press' dan 'presser/plunger' ditekan/tarik berulang kali dengan memastikan udara banyak 'dimasukkan' ketika proses itu. Mengacau susu panas dengan sudu juga boleh mengudarakan susu tetapi udara yang masuk ke dalam susu adalah sedikit dan kocakannya kurang.

Susu panas yang dimanipulasi dengan french press. Buih susu berada di bahagian atas manakala di bawahnya ialah susu panas yang bergelembung halus.
Jika menggunakan Aerolatte (http://www.aerolatte.com/), ternyata lebih mudah untuk mengudarakan susu mengikut keperluan, samada menghasilkan sedikit atau banyak buih. Aerolatte juga sangat mudah dicuci, tidak seperti 'french press'. Pastikan bateri berkuasa tinggi digunakan (bateri cas semula adalah terbaik) - jika bateri lemah, kadar putaran menjadi perlahan dan susu yang diudarakan kurang menjadi (contoh: buihnya kurang halus).

Kopi Illy memang terbaik untuk menghasilkan minuman berasaskan espresso seperti cappucino dan latte.
Aerolatte pula memudahkan pembuihan susu panas.

Jenis kopi kisar yang saya cadangkan untuk minuman jenis kopi/espresso bersusu ialah kopi tahap 4 ke 5/6 kerana beza rasa kopi dan susu adalah jelas (rasa kopi yang pahit dan rasa susu yang lemak). Manakala bagi minuman kopi-O / 'long black' / 'americano', saya cadangkan kopi sederhana kuat ('medium strength') tahap 3 ke 4, seperti Colombian (untuk lebih menghayati rasa unik kopi, bukan sekadar rasa pahitnya). Walaubagaimanapun, tiada masalah sekiranya menggunakan kopi sederhana kuat dalam minuman bersusu - hasilnya kopi yang 'lembut' dan 'menenangkan' iaitu rasa kurang pahit dan rasa lemak, sesuai diminum bila-bila masa. 
'Home made latte' - buih susu disediakan dengan Aerolatte :) 
Sekarang ini saya rasa agak keberatan untuk membeli kopi di kafe-kafe kecuali untuk beberapa jenis kopi yang sukar saya bancuh sendiri di rumah. Walaupun saya hanya menggunakan kopi siap dikisar yang terdapat di pasaraya berbanding biji kopi yang dikisar sendiri, namun dengan menggunakan moka pot dan memanipulasi susu panas, saya dapat membancuh kopi yang lazat, sekurang-kurangnya untuk diminum sendiri :).

Thursday 25 August 2011

Real Grade 1/144 Aile Strike Gundam - Review Part 1 of 2 (Assembly)

RG Strike Gundam
Real Grade 1/144 Aile Strike Gundam. What I can say that it is the best gunpla in my collection. Having build many HGs before, I feel like building a Master Grade at a smaller scale. Compared to the HG version, the RG version looks sharper with lots of fine detail - the Aile Striker clearly have a wider wingspan.


RG Aile Striker - note the wide wingspan
I'm amazed with the excellent Advanced Frame Joint - just need to cut it out and then attaching the armors  to it. What's more, the articulation is above expectation especially the leg frame. Meanwhile, the arm frame  is quite flimsy and fragile.

Advanced Frame Joint - with some parts attached including cockpit and head armors
Excellent articulation for 1/144 scale
For the head sensor, I m using turquoise permanent marker, applied to all sides of the transparent sensor part except the front and back section (the only visible areas once the armor have been attached) - I want to retain the shiny transparent surface. The result is a blue-ish transparent sensors. For the eyes, I omit the sticker given and painted gold on the back/inner-side of the transparent part, so that the shiny transparent surface is retained. Then I painted black for the area surrounding the eyes. It looks good when the golden colour can be seen through the transparent part.  The CIWS machine guns are painted with silver paint marker.

Head unit: note the blue colored sensor and silver painted CIWS machine guns
Head unit: note the gold colored eyes
The main body/torso part is pretty straighforward. Good articulation especially near the waist part. The cockpit part is a bonus - with opening hatch. I painted the cockpit seat in orange to match the real cockpit colour of Strike Gundam. Also, a bit of red on the left & right of the headreast - to indicate the blindspot warning lights (even though they are never shown in the anime or actual unit). I applied some shiny stickers too on the inner-side wall of the cockpit, to indicate screen monitors. On the back, the slot for the striker pack is different than HG's, so some modification need to be used if other HG striker packs to be used e.g. Launcher, Noir or IWSP - a bit of dissapointment here.

Main body/torso with cockpit hatch open
Cockpit seat

Note the Striker Pack slot - other HG or 1/144 packs need modification to fit in

The arm part looks flimsy and fragile without the armor. Attaching the armor to the arm frame is easy, but the forearm part can get loose a bit when bending the arm. Articulation is impressive, which can be fully bent. The shoulder section is excellent with opening mounting rack (for attaching striker pack component e.g. shoulder component for Launcher/Sword pack). two set of manipulators/hands are given: one set of closed-palm and one set with articulated fingers. There is a slot in each hand to attach the beam rifle or beam saber peg. I found that the beam rifle's peg need some effort to get into the slot and it dropped out a few times from the beam rifle's handle - the worst thing is that the peg is very very small! I prefer the not-realistic-but-effective HGUC Sinanju's beam rifle peg. 

Arm section 
The waist part is simple with moveable front and rear skirt armor - easy to attach. The side hip armor have opening hatch to store the Combat Knives. The side hip armor may hinder some leg movement, but it is tolerable.
Side hip armor storing the Armor Schneider Combat Knife 
The leg part is superb, with many points of articulation. Attaching the armor section is easy. 
Superb leg part - excellent articulation
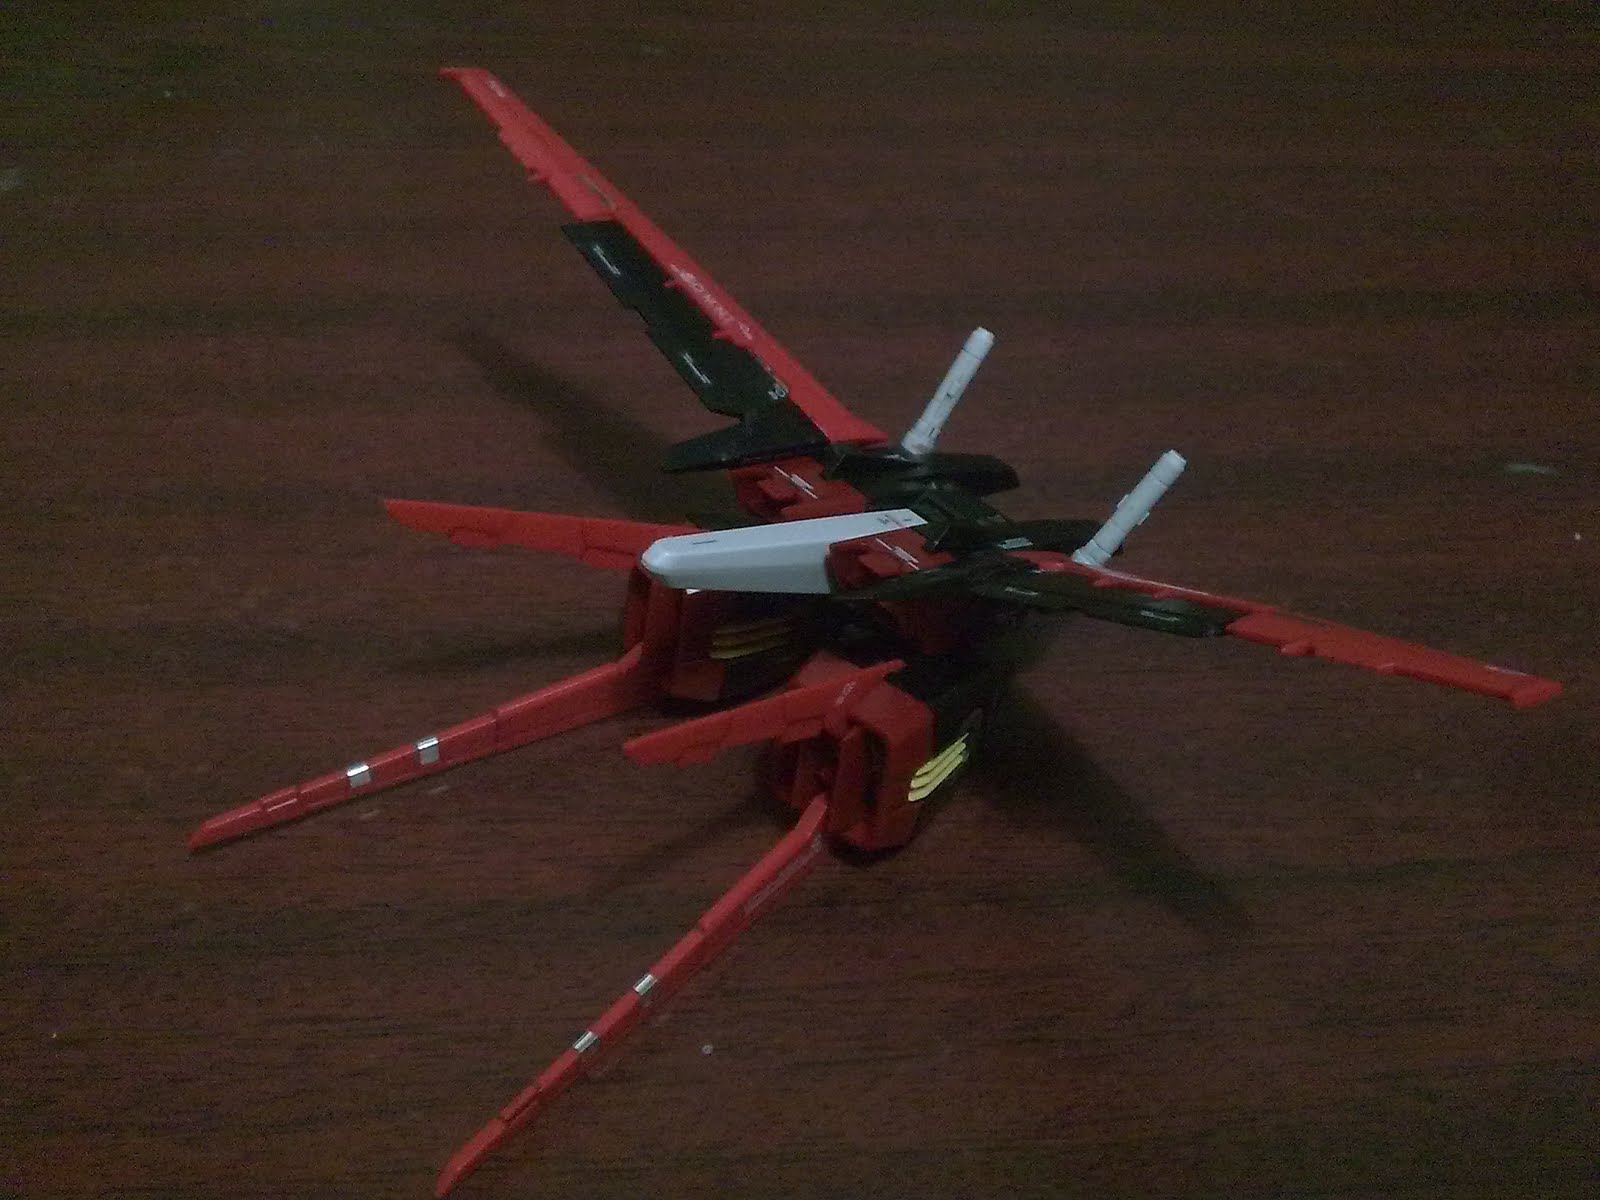
The Aile Striker pack features wide wingspan and impressive details, even though there is no dedicated internal frame as the Strike Gundam. The wing can be folded down but only half way, which may disappoint some. The thruster section is highly detailed for this scale, and I have used gold and silver paint to bring out the details - the gold paint is lightly brushed on the surface using cotton bud, with the help of gundam marker remover, and silver paint for the outer rim of the nozzles and also for the smaller thruster's nozzles.  
Aile Striker - rear view
Gold and silver paint used to bring out the detail of the thruster section
The weapons supplied is 2 x beam sabers (two hilt grip set: normal and with-peg, 2 x combat knives (foldable, to be stored in hip armor), a beam rifle and a shield - all with good details especially the shield. The Beam rifle has transparent sensor section, which I apply the same technique as for the head sensor. The combat knive's blade is painted with silver paint marker, then immediately brushed with a cotton bud to get a better looking finish.

Weapons and accessories, clockwise: beam sabers, extra beam saber hilts with peg, shield, beam rifle, combat knives, adapter for stand, and extra set of hand
Below are some points to summarize it:

Good:
> Master Grade experience at smaller scale
> Excellent articulation, especially the leg part
> Highly detailed parts
> Easy to assemble

Less Good:
> Overall quite fragile - need care
> Unable to fit in HG striker packs - need some modification or adapter
> Quite back-heavy with Aile pack - best to use a stand
> Some stickers not practical e.g. the silver dots for the back of the feet
> The hand set may have good articulation i.e. movable fingers but quite weak when handling weapon - I prefer to have a HGUC-style hand (like Sinanju's)
> Beam rifle peg - very small and I found it a problem when attaching it to the hand palm slot. Also, I prefer the peg design on HGUC Sinanju's hand
> No extra top parts (guard) of the beam saber hilt - need to be shared by both hilt with & without peg

Need attention:
> Very small parts - careful not to lose them
> Careful when playing with the articulated hand - they are delicate
> Moveable frame may need some play to loosen it - to avoid breaking
> Some parts is left/right specific, so following the manual is a must - usually if certain part is not fitting well, then just swap it with another.

What's the next RG for SEED series? Hmmmmm... Freedom Gundam! Yeay!
Highly recommended gunpla. The final part of the review (Part 2 of 2) will consist of various pose of RG Aile Strike Gundam with full armor attached. 

Sunday 15 May 2011

Kopi Kopi Kopi

Contoh kopi brew: Cappucino, iaitu kopi brew + buih susu (milk froth) & susu panas/kukus (steamed milk)  
Kopi, pada pendapat saya, antara minuman yang terbaik & terlazat di dunia. Rasa utama kopi ialah pahit, tapi pahit yang bersulamkan bermacam rasa & aroma yang sungguh menyenangkan. Kopi mengandungi kafein, bahan kimia yang boleh merangsang badan dan minda - selalunya dapat hilangkan mengantuk dan meningkatkan tumpuan/konsentrasi.

Kopi secara umumnya terdapat dalam dua bentuk/jenis: Kopi brew (BM: renih) dan kopi segera (instant). Kopi brew, pada pendapat aku ialah 'kopi sebenar', yang dihasilkan dengan cara biji kopi dikisar, dan kemudian ditemukan dengan air dengan pelbagai cara seperti direndam (french press @ plunger), ditapis (drip/filter), atau dikenakan tekanan (pressurised / espresso method). Hasilnya kopi yang penuh dengan rasa. Kopi segera dihasilkan dengan kopi brew yang di 'freeze-dry', menghasilkan serbuk kopi yang nyah-hidrat (tanpa air). Bila dicampur dengan air, menghasilkan kembali kopi, tapi oleh kerana ia telah melalui proses freeze dry, terdapat kemungkinan sebahagian rasa telah 'hilang'. Walaubagaimanapun, kopi segera sangat mudah untuk disediakan iaitu hanya perlu dicampur air.

Masih teringat semasa zaman sekolah, saya selalu buat Nescafe ais gelas besar ataupun satu jag. Satu ketika pula suka sangat ice-blended Coffee Bean. Usually Ultimate Mocha atau Vanilla tu yang jadi pilihan. Untuk kopi panas, saya sukakan Secret Recipe's Long Black. Selalunya saya pesan dengan susu panas (steamed milk). Pada pendapat saya, untuk kopi brew macam tu, CBean/Sbucks belum dapat tandingi.

Sekarang berada di Ireland memang satu kelebihan dan kesempatan untuk  penggemar kopi macam saya Sebabnya, di sini SEJUK. Boleh dikatakan sejuk sepanjang tahun, yang membezakan ialah tahap sejuk. Walaupun pada musim panas, sejuknya masih terasa terutamanya waktu petang ke malam (sejuk yang dibawa oleh angin). Jadi di sini kurang risau badan terlebih panas kalau banyak sangat minum kopi. Pilihan kopi di sini banyak. Brand tempatan contohnya Bewley's, Robert Roberts dan Java Republic. Harganya sekitar 2-5 Euro untuk satu pek biasa kopi kisar (ground coffee).
French Press @ Plunger - kopi dicampur dengan air dan dibiarkan  3-4 minit, ditapis ('plunge' / tekan ke bawah), dan kopi  brew siap!
Saya menggunakan kaedah french press @ plunger untuk membuat kopi, di mana harganya murah dan dapat menghasilkan kopi yang sedap & berkualiti. Espresso machine mahal dan di luar bajet. Mungkin akan cuba 'moka pot' pula, yang mana boleh digunakan atas dapur (hot plate) dan mampu hasilkan kopi berkualiti seperti espresso. Selalunya guna kopi kisar dalam pek. Kalau beli biji kopi dan kisar sendiri lebih baik, tapi leceh pula - belum cuba lagi.

Biasanya saya minum kopi mesti dicampur dengan susu panas atau sejuk, bersama gula merah 'demerara' (brown sugar). Pada pengalaman saya, kelebihan nyata kopi brew berbanding dengan segera/instant ialah bila kopi dicampur susu. Kopi segera setakat yang saya pernah cuba, belum dapat kalahkan kopi brew kalau dicampur dengan susu. Cuma, yang agak peliknya, kopi segera ni sesuai kalau nak hasilkan 'espresso latte'. Rasanya lebih kurang sama dengan yang dibuat dengan menggunakan espresso machine.  Kadang-kadang saya campur kopi dengan Coffeemate - memang sedap & lemak, mampu tutup kelemahan/rasa-kurang-sedap yang ada dalam sesuatu jenis kopi. Ada hari-harinya, saya minum kopi-O sahaja.
Robert Roberts Colombian ground coffee (kopi kisar) - sangat dianjurkan (highly recommended) terutamanya kepada sesiapa yang baru mencuba kopi
Sekarang ni Robert Roberts' Colombian yang jadi kegemaran no.1 - rasanya memang sedap, tidak terlalu 'strong' dan boleh minum berkali-kali. rasa pahitnya pun sedikit sahaja. Masih ada sedikit Bewley's standard - rasanya sederhana / boleh tahan - dapat percuma sekali dengan french press baru (french press sebelum ni retak). Juga, Robert Roberts' Java - sedap tapi 'too strong' kalau nak minum selalu. Mula-mula dulu try Tesco's Italian, Espresso, Original dan French - semua boleh dikatakan sedap dan very-acceptable walaupun harga murah. Pernah juga cuba Java Republic's Mocha Cento - memang sedap dan nak beli lagi.
Kopi kisar @ ground coffee. Kalau lebih rajin, beli biji kopi yang telah dipanggang &  kisar sendiri di rumah (saya sendiri pun tak buat sebab agak melecehkan)
Bila dah boleh brew sendiri kopi di rumah, dapat jimat duit juga - tak perlu nak beli kopi di kedai/kafe kecuali untuk kopi berkualiti espresso (sebab mesinnya belum mampu dimiliki).

Tuesday 10 May 2011

Intro to blog

HGUC Sinanju - currently the best in HG 1/144 series
Welcome to my blog :).


I've heard the word 'Gundam' during my teenage years, but only during 2005/2006 that I gained my interest about it. It started when I bought two non-grade 1/144 SEED model kits for my nephew's birthday (Strike Freedom & Blaze Zaku Phantom) plus one for myself , a non-grade 1/144 Saviour Gundam). Back home, I'm amazed at how accurate the pieces when assembled together and how accurate the stickers when applied. The accurateness really impress me. Then continuing with the old Gundam Wing 1/144 series and Endless Waltz HG line. Finally, the time has come to step up starting with HG 1/144 Aile Strike Gundam.
HG00 Qan[T]
While doing all these model kits, I surfed the internet to check out background, details and storyline of the Gundams. Which got me into the anime itself. I favour SEED, 00 and Unicorn series. SEED is my top favourite as I am familiar with the background and technology: I found it to be a nice combination of real world & fiction sciences, e.g. Phase Shift Armor, requirement of flight unit/pack for sustained flight. I remember back then during my university days: my best friend watch Gundam SEED on my PC (I remember most the scene where Launcher Strike run out of power during the desert battle). At that time, I don't have any interest in it, preferring much Star Wars over anything else. The alternatives: Gundam 00 for its futuristic, fresh and fast-paced elements, while Gundam Unicorn is detailed, elegant and established. 
HG SEED Destiny
Note that all but one of my Gundam collection is in 1/144 scale. The odd one is MG F91 (which I don't really like, I feel that the quality is not so good, fragile and doesn't feel solid). To date, I prefer 1/144 scale over everything else - and feel very very lucky with the latest release of Real Grade Aile Strike Gundam. Generally, I like miniatures, and do collect some Star Wars Titanium Series, Hot Wheels, Micro Machines etc. 
HGUC Unicorn
HGUC Loto
Currently I have collected almost all HG in the SEED/Destiny/Stargazer series. My favorites: Strike Noir, Verde Buster, Blu Duel, Legend and Shiranui Akatsuki. HG00 favourites: Exia, 00 (without Raiser), Qan[T]. Unicorn favorites: HGUC Unicorn (both mode), Loto, and Sinanju. Note the HGUC lines is really impressive, and the quality, detail & articulation surpass the other HG lines. 
HG SEED CGUE D.E.E.P. Arms
My gunpla technique involve straight build, some paint/touch-up using Gundam Marker and panel-lining. No-serious painting involved. Usually I will paint first parts which are difficult to paint after assembly such as the eyes/sensors and the internal section (to improve depth, as if the armor consist of two-parts). I like to put some decals too: the Gundam looks nicer with them. For transparent parts which has become the trend for HG00, I'm using permanent marker to paint the inside of the clear part. Also, using gold & silver paint marker for hydraulic pipes and other suitable parts.
HG00 Exia Avalanche Dash
You will notice that most of my model kits have nub marks & excessive paint which can be an eyesore to viewers - I usually trim/clean-up those down much much later when I have proper & extra-free time. Very difficult nowadays when having kids around - kids safety is top priority. That is also one of the reason why top coat is not an option (beside cost and proper ventilation space). To date I have only experiment top coat (matte) to HG 1/144 Blitz (the result is excellent) and HG Verde Buster (quite a failure, due to spraying in low-temperature environment (rain)), plus a few parts such as beam rifles etc.


More about Gundam models in my next post :)

Monday 9 May 2011

Qan [T] HG00 1/144

    Front view
Qan[T], successor to 00/+Raiser. New twin-drive design (one GN drive in main body and another one in the shield binder. The overall design is quite simple, not-bulky and unique. Main feature: 7-transparent green GN-bit/blades, with 6 of them can be mounted on the shield or can be combined with the main sword to form Buster Rifle or Buster Sword. Good that the chest GN condenser design returns (which the 00 don't have). 

Rear view
GN shield with 6-GN bits attached. A GN drive is hidden underneath.
Even though Qan[T] have very short screen time in the anime movie (especially the lack of combat between mobile suits), the model kit is worth getting. Excellent gunpla quality & excellent articulation (as good as Exia and 00 Gundam). One thing to criticize: the GN drive section for both in body & shield is just dark-green stickers - no clear plastic parts :/


As usual, some touch-up using gundam markers. For panel lining, I'm using grey Gundam Marker for bright-colored parts (e.g. white, red), and black for dark-colored parts (e.g. grey, blue). I'm using different approach for the eyes/sensor part since the part came in transparent color: instead of painting on top of it, this time painted with green permanent marker on the inside (just like my usual practice for all GN-condensers for 00 series). Done this before with MG F91, but never before with 1/144 models. When properly angled/positioned with torchlight/LED, the eyes light up :). Considering to put LED lighting inside :)

Buster sword mode
Buster sword mode: 6-remote blades combine with the main GN-Sword. Not shown in the anime. The hand able to hold it despite of the weight.  

Buster rifle mode
Buster rifle mode - function as buster cannon/rifle & 'raiser-sword' mode. Shown in the anime.
Quantum system activated
Both GN drive connect in series configuration. Quite difficult to get 100% accurate connection.
Quantum system mode, some kind of higher-level communication - sort of hyper-broadband ;) . In the anime, some armors detached, GN condensers extend-out/jut-out, feet detached, and the chest GN condenser extend-out. Note that the 6-GN bits can be arranged to produce intense GN field for teleportation device. Read more at: http://gundam.wikia.com/wiki/Quantum_Teleport_System

Conclusion: a very nice model kit. Highly recommended :)